Microsite Menu Types
Your microsite can have its own internal menus. These menus can include Microsite Inner Pages, pages on the main website, external links, or anchor links to headings further down the page.
There are three main types of microsite menus: Navigation, Utility, and Footer. Most microsites will only have a custom Navigation menu, unless they are particularly high-profile, permanent sites. (For example, a conference microsite, which is not permanent, would not have a utility menu except in special circumstances.)

Adding a Microsite Menu
Step 1: Create the Menu
In the Administrator Tool Bar, click “Structure” and then hover over “Menus.”
Click “Add Menu.”
Give your menu a title. In the Title field, insert the name of the microsite (e.g., “Admitted Students” and the location of the menu (e.g., “Navigation”).
You will also need to enter an Administrative Description. This allows other CMS editors to understand more about the menu. For example: “The Admitted Students micro site’s utility menu. This menu is above the main menu.”
Click Save. You will automatically be taken to a page where you can add links to the menu.
Step 2: Add Links to the Menu
Once you’ve created the menu, you can add items (links) to it.
Click the blue “+ Add Link” button at the top of the page.
You must give your link a title in the “Menu Link Title” field. Then you add the destination URL to the “Link” field.
Then click “Save.” Repeat this process until you’ve added all the links you’d like to add to the menu.
Remember: To add links to pages in your microsite or on the main website, you must create and publish the destination page first.
Getting Your Microsite Menu to Appear
Step 1: Go to the Block Layout Page
Go to the Block Layout Page. You can access it from a link at the top of the Menus Page or by clicking on Structure > Block Layout Page.
Step 2: Configure Your Menu
Scroll down to find your menu on the Block Layout Page.
- Utility Menus appear in the Header section (at the top).
- Navigation Menus appear in the Subheader section (near the top).
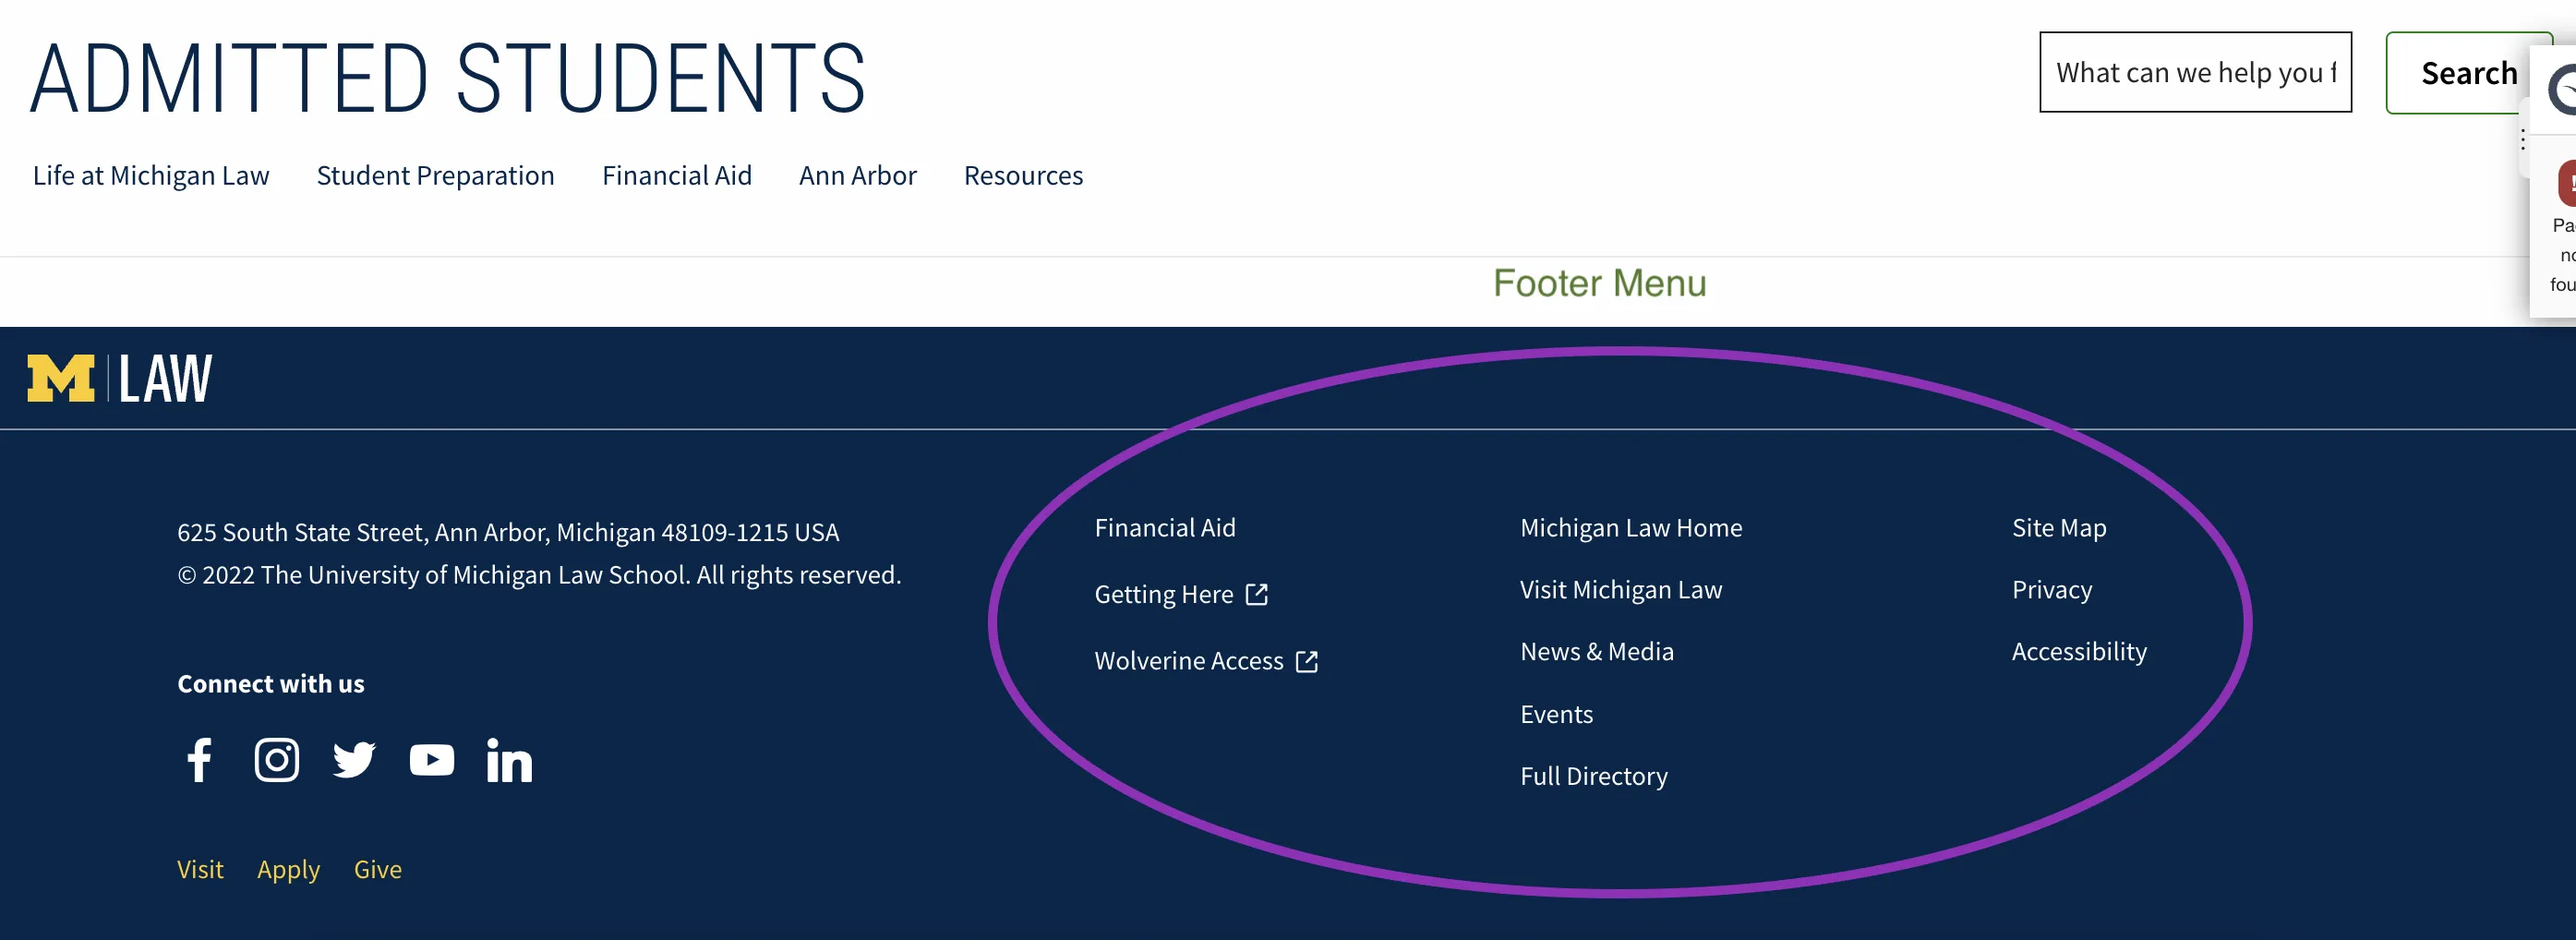
- Footer Menus appear in the Footer Middle section (near the bottom).
Click “Configure.”
Step 3: Ensure Your Microsite Page Title is Visible.
On the Configure Block Layout page, just under the Block Title field, ensure that “Display Title” is checked. For conference and reunion microsites, this will allow you to display the event series at the top of the page and the specific event theme in the microsite banner.
Step 4: Ensure Your Microsite Menu is Visible.
Scroll down to the Visibility portion of the page. Click the Pages tab. Copy the microsite URL root and paste it into this field.
For example, the root of this microsite’s URL is “/creating-conference-microsites”.
Once you’ve down that, add an asterisk (“*”) to the end. This will ensure that all pages associated with this microsite in the CMS will be visible in the menu (of course, this will happen only after you’ve added those pages to the menu).
Now make sure the box labeled “Show for the listed pages” is checked. In some cases, you’ll be checking the “Hide for the listed pages” box. But that will come later.
Click “Save Block.”
Cleaning Up Your Now-Messy Microsite Header
Congratulations! You’ve deployed a menu for your microsite. But if you’ve added a navigation or utility menu, something looks a little off now, doesn’t it?
Unfortunately, creating a microsite navigation menu breaks the existing utility menu and adds empty white space where breadcrumbs would normally appear. To fix this, you have to hide them from your microsite.
And if you added a Utility menu … well, that might not work at all until you’ve hidden the existing Utility menu.
So let’s go hide them.
Step 1: Configure the Main Site’s Utility Menu.
Go back to the Block Layout Page.
The very first item, under the Header section, should be “Utility Menu.” Find it, and click the “Configure” button to the right.
Step 2: Hide the main site’s Utility Menu on your microsite pages.
Scroll down the Visibility section, and click on the “Pages” tab.
As before, copy and paste the URL root for your microsite, and add the asterisk (*) at the end (e.g., ”/creating-conference-microsites*”).
This time, you want to check the box (or ensure the box is checked) for “Hide for the listed pages.” A number of microsites are already listed in the field—that’s how you’ll know you’re in the right place.
Click “Save Block.”
Step 3: Configure the main site’s Breadcrumbs functionality.
Back at the Block Layout Page, scroll down to the Breadcrumbs section (about halfway down the page).
Click “Configure.”
Step 4: Hide the main site’s Breadcrumbs space from your microsite’s pages.
Once again, you’ll go down to the Visibility section and click on Pages. Add your microsite’s root URL plus an asterisk, ensure that “Hide for the listed pages” box is checked.
Click “Save Block.”
That’s it! You’re done creating your microsite’s navigation menu and hiding the pieces that were broken in the process.
If you need to add custom Utility and Footer menus, you’ll follow a very similar process.
Adding Custom Footer and Utility Menus to Your Microsite
If you want to add a navigation menu to your microsite, you will have to hide the Utility Menu. But what if you want to add your own Utility Menu (e.g. Admitted Students)?
You’ll have to follow the same process of creating a Utility Menu or Footer Menu, add links to existing or external pages, and then place them on the page.
But you’ll also have to hide the main site’s Utility and Footer menus so only your custom versions show. To do this, go to the Block Layout Page, and find the main site’s Utility Menu (top of the page) or Footer Menu (under the Footer Middle section, near the bottom).
As above, you’ll have to click on “Configure” for these menus and then hide them on your microsite’s pages using the URL root and asterisk method.
Make sure to save.